
Written by A.R.Jeffery 18.11.10
This tutorial was written using PSP ver 8.10.
It has been tested in ver-10 and ver-12(and Ultimate) but not ver-13 Some knowledge of Paintshoppro is assumed, but you are always welcome to email me if you have a problem.
You can download a Trial version of Corels Paint Shop Pro 13. Here
A pearl tube from Here
Please do not use any other tube, these are particular to this effect.
Vector tube script from Here
Extract your pearl tube to your tubes folder and your script to Scripts restricted folder.
Open a new blank canvas 700x700 pixels,
you can crop your image later.
Open your Preset Shapes box and select Ellipse with the settings below.

Draw a reasonable sized circle or ellipse. Do not convert to raster keep this as the active layer.
Open your Tubes and find the Pearls you downloaded and select with the settings below.

Open the script dialogue and find Vector Tube. Click the arrow to run the script. Your image should look something like mine.
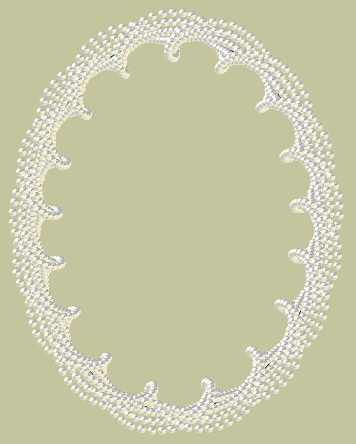
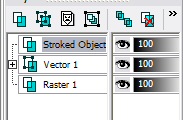
Your layer palette now has a top layer called stroked object,
Use the magic wand with the settings below to select inside the pearl frame. Add a new raster layer and move to the bottom. Copy and paste a chosen image or photo into the selection. TIP_(Right click your image with the new layer active, select paste into selection). Back to your stroked object layer. Add a soft drop shadow. Ver=1 Horiz=-1 Opacity=100 Blur=5 I used #7E654C.

Now have some fun experimenting with other tubes, if you like what you have used save your setting in the Presets dialogue box for next time.
Email
Tutorials
Home
Handcoded in Notepad.
All graphics and website design.
©Anita
2002-2011
|